阅读这篇指南,您将了解到如何配合 Google 跟踪代码管理器 (GTM) 使用 Adjust Web SDK,包括加载、初始化和跟踪事件的设置。
加载并初始化 Web SDK
按照下列步骤操作,创建一个能加载并初始化 Adjust Web SDK 的 GTM 标签。
1. 创建自定义 HTML 标签
为标签起一个描述性的名称,例如 Adjust Web SDK - Load and Initialize。
2. 添加 SDK 加载器代码片段 (Loader Snippet)
在 GTM 自定义 HTML 标签中,添加下列任一加载器代码片段。
自动 SDK 更新方法
此方法使用 adjust-latest.min.js,以始终获取最新版本的 Adjust Web SDK。
操作方法: 复制下列 SDK 加载片段,并将其粘贴进 GTM 自定义 HTML 标签中。
<script type="application/javascript">!function(e,t,r,a,n,o,l,i,s,c,d,h,u,f,m){var p=l+"_q",g=l+"_c";e[l]=e[l]||{},e[p]=e[p]||[],e[g]=e[g]||[];for(let t=0;t<i.length;t++)h(e[l],e[p],i[t]);for(let t=0;t<s.length;t++)u(e[l],e[p],s[t]);for(let t=0;t<c.length;t++){const r=c[t][0],a=c[t][1];let n;e[l][r]=function(...t){return n=this,e[g].push((function(){n[d]=new e[l][r](...t)})),n};for(let t=0;t<a.length;t++){const o=a[t];e[l][r].prototype[o]=function(...t){e[g].push((function(){n[d][o](...t)}))}}}f=t.createElement(r),m=t.getElementsByTagName(r)[0],f.async=!0,f.src=a,f.onload=function(){for(var t=0;t<e[g].length;t++)e[g][t]();e[g]=[];for(t=0;t<e[p].length;t++)if(e[p][t][1][0]&&e[p][t][1][0][d])e[l][e[p][t][0]](e[p][t][1][0][d]);else{const r=e[p][t][2];r?e[l][e[p][t][0]].apply(e[l],e[p][t][1]).then((e=>r.resolve(e))):e[l][e[p][t][0]].apply(e[l],e[p][t][1])}e[p]=[]},m.parentNode.insertBefore(f,m)}(window,document,"script","https://cdn.adjust.com/adjust-latest.min.js",0,0,"Adjust",["initSdk","getAttribution","getWebUUID","setReferrer","trackEvent","addGlobalCallbackParameters","addGlobalPartnerParameters","removeGlobalCallbackParameter","removeGlobalPartnerParameter","clearGlobalCallbackParameters","clearGlobalPartnerParameters","switchToOfflineMode","switchBackToOnlineMode","stop","restart","gdprForgetMe","disableThirdPartySharing","trackThirdPartySharing","initSmartBanner","showSmartBanner","hideSmartBanner"],["waitForAttribution","waitForWebUUID"],[["ThirdPartySharing",["addGranularOption","addPartnerSharingSetting"]]],"__realObj",(function(e,t,r){e[r]=function(){t.push([r,arguments])}}),(function(e,t,r){e[r]=function(){const e={};return e.promise=new Promise(((t,r)=>{e.resolve=t,e.reject=r})),t.push([r,arguments,e]),e.promise}}));</script>使用子资源完整性 (SRI) 特定 SDK 版本方法
此方法会加载特定 SDK 版本,并使用子资源完整性 (SRI)。这种方法使用版本特定的、带有 integrity 哈希和 crossOrigin 属性的 src URL。借助这些元素,浏览器可以验证脚本是否被更改过。该方法需要手动更新,才能接收新的 SDK 版本。
操作方法: 复制下列 SDK 加载片段,并将其粘贴进 GTM 自定义 HTML 标签中。
<script type="application/javascript">!function(e,t,r,n,a,o,i,l,s,c,d,h,u,f,m){var p=i+"_q",g=i+"_c";e[i]=e[i]||{},e[p]=e[p]||[],e[g]=e[g]||[];for(let t=0;t<l.length;t++)h(e[i],e[p],l[t]);for(let t=0;t<s.length;t++)u(e[i],e[p],s[t]);for(let t=0;t<c.length;t++){const r=c[t][0],n=c[t][1];let a;e[i][r]=function(...t){return a=this,e[g].push((function(){a[d]=new e[i][r](...t)})),a};for(let t=0;t<n.length;t++){const o=n[t];e[i][r].prototype[o]=function(...t){e[g].push((function(){a[d][o](...t)}))}}}f=t.createElement(r),m=t.getElementsByTagName(r)[0],f.async=!0,f.src=n,o&&(f.crossOrigin="anonymous",f.integrity=o),f.onload=function(){for(var t=0;t<e[g].length;t++)e[g][t]();e[g]=[];for(t=0;t<e[p].length;t++)if(e[p][t][1][0]&&e[p][t][1][0][d])e[i][e[p][t][0]](e[p][t][1][0][d]);else{const r=e[p][t][2];r?e[i][e[p][t][0]].apply(e[i],e[p][t][1]).then((e=>r.resolve(e))):e[i][e[p][t][0]].apply(e[i],e[p][t][1])}e[p]=[]},m.parentNode.insertBefore(f,m)}(window,document,"script","https://cdn.adjust.com/adjust-5.8.0.min.js",0,"sha384-YR61L/f7VPKFN/TX5B8GpDD7MJlerBFDvNVnKIp7ac2uwHHlP0O9mdOw5aDZ4T/6","Adjust",["initSdk","getAttribution","getWebUUID","setReferrer","trackEvent","addGlobalCallbackParameters","addGlobalPartnerParameters","removeGlobalCallbackParameter","removeGlobalPartnerParameter","clearGlobalCallbackParameters","clearGlobalPartnerParameters","switchToOfflineMode","switchBackToOnlineMode","stop","restart","gdprForgetMe","disableThirdPartySharing","trackThirdPartySharing","initSmartBanner","showSmartBanner","hideSmartBanner"],["waitForAttribution","waitForWebUUID"],[["ThirdPartySharing",["addGranularOption","addPartnerSharingSetting"]]],"__realObj",(function(e,t,r){e[r]=function(){t.push([r,arguments])}}),(function(e,t,r){e[r]=function(){const e={};return e.promise=new Promise(((t,r)=>{e.resolve=t,e.reject=r})),t.push([r,arguments,e]),e.promise}}));</script>未来,如果您需要更新 SDK 版本,请按照下列步骤操作:
- 使用新的 SDK 版本编号 (例如
adjust-5.8.0.min.js) 更新src属性。 - 更新
integrity哈希。Adjust Web SDK Github 版本对应的INTEGRITY哈希文件包含该值。
3. 添加 SDK 初始化代码
在同一个 GTM 自定义 HTML 标签中,紧跟加载器代码片段之后添加以下初始化代码:
<script> // --- Initialize the Adjust SDK --- Adjust.initSdk({ appToken: "YOUR_APP_TOKEN", // Required: Replace with your Adjust App Token environment: "sandbox", // "sandbox" for testing, "production" for live });</script>完整的自定义 HTML 标签包含选定的 SDK 加载器代码片段,以及此初始化代码片段。
4. 设置标签触发选项 (Tag Firing) 和触发 (Trigger)
- 在 GTM 代码配置中展开 Advanced Settings ,然后为 Tag firing options 选择 Once per page 。
- 点击 Triggering ,选择 All Pages (Page View) 触发。
- 保存 标签。
标签应如下所示:
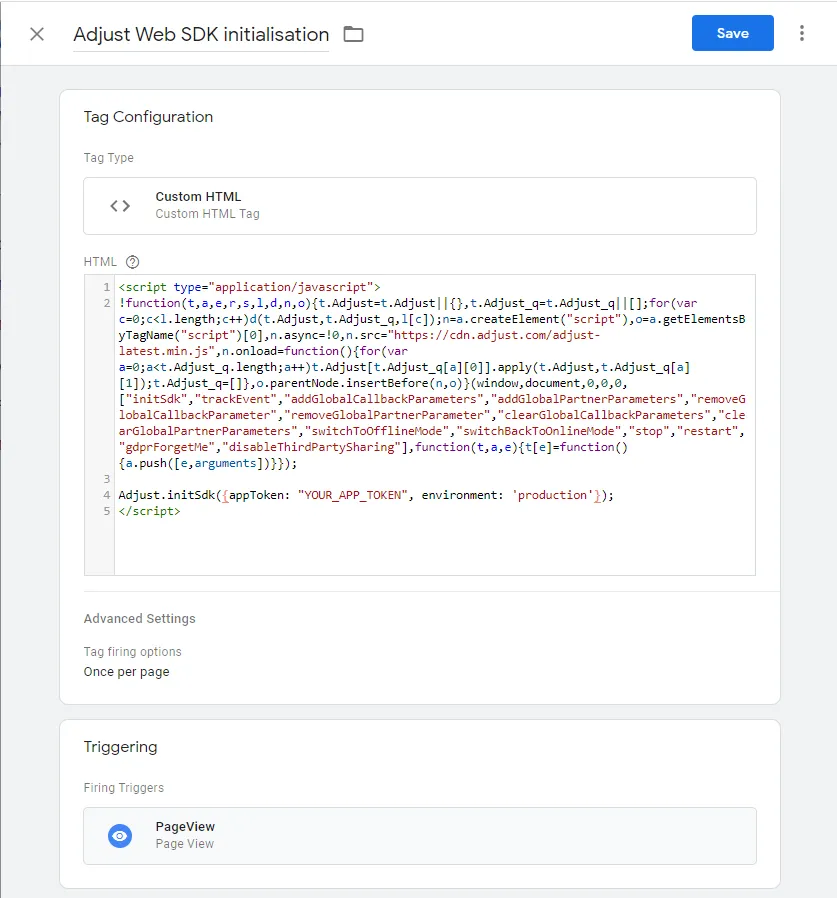
现在,您的 GTM 标签将根据您选择的方法和触发条件,加载并初始化 Adjust Web SDK。
trackEvent
1. 创建新的自定义 HTML 标签
- 在 GTM 容器中找到 Tags ,然后点击 New 。
- 为标签命名时,请使用描述性的名称,例如“Adjust Event - User Registtration” (Adjust 事件 - 用户注册)。
- 点击 Tag Configuration ,选择 Custom HTML 。
2. 添加事件跟踪代码片段
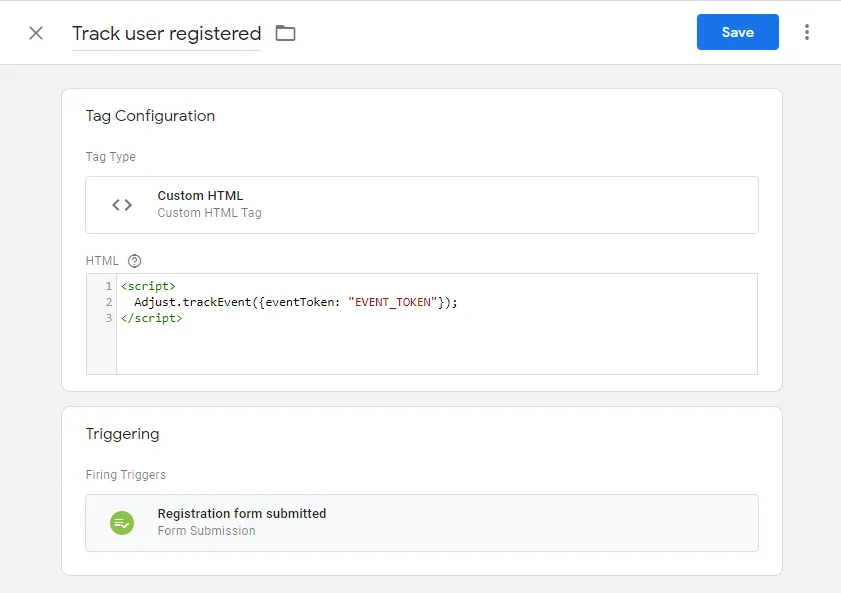
将以下代码片段添加至 HTML 字段:
<script> Adjust.trackEvent({ // Required: Replace "EVENT_TOKEN" with your specific Adjust event token. eventToken: "EVENT_TOKEN",
// Optional for revenue/currency: uncomment lines below. // revenue: {{DLV - Transaction Revenue}}, // currency: {{DLV - Transaction Currency}} });</script>3. 设置触发
设置一个触发,根据特定的用户操作触发此事件标签。下面是两个常见的示例。
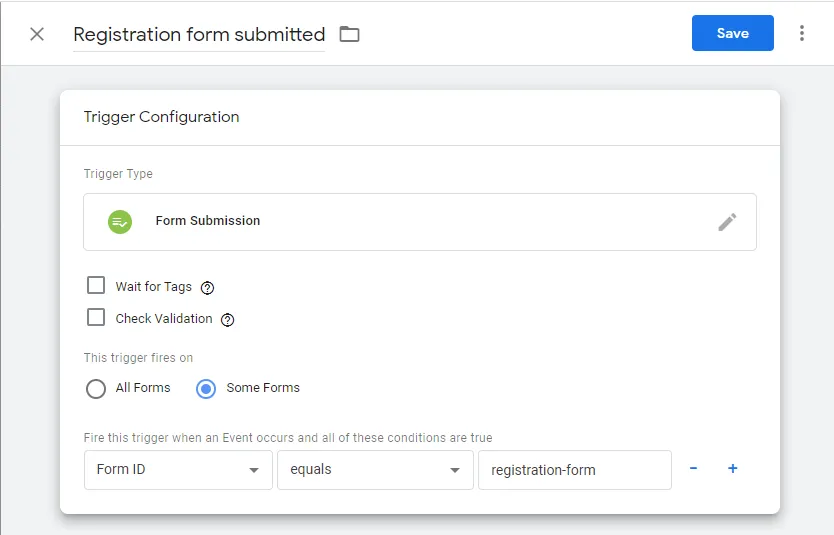
示例:跟踪表单提交 (如用户注册)
- 创建一个新的触发并为其命名,例如“Registration form submitted” (注册表单已提交)。
- 选择 Form Submission 作为触发类型。
- 找到 This trigger fires on ,选择 Some Forms 。
- 定义一个识别表单的条件,例如
Form IDequalsregistration-form。 - 保存 触发。
示例:跟踪由数据层驱动的事件 (如包含收入的购买)
此方法用于事件,例如网站通过向数据层推送信息而指示的购买事件。
- 创建一个新的触发并为其命名,例如“Purchase completed” (购买已完成)。
- 选择 Custom Event 作为触发类型。
- 在 Event Name 字段中准确输入开发团队提供的名称,例如
purchase_completed。 - 找到 This trigger fires on ,选择 All Custom Events 。
- 保存 触发。
以下是示例用户注册事件的触发配置:
4. 设置标签触发顺序 (Tag Sequencing)
- 打开事件标签 Advanced Settings ,找到 Tag Sequencing 。
- 启用 Fire a tag before [此处是您的事件标签名称] fires 。
- 为 Setup Tag 选择 “Adjust Web SDK - Load and Initialize”标签,这样可以确保在跟踪任何事件之前加载 SDK。
- 保存 事件标签。
以下是示例用户注册事件的标签配置:
为动态数据设置 GTM 变量
如果您的事件包含收入等动态数据,假设数据层已经过配置,能够提供此数据,那么您就可以使用 GTM 变量,从网站数据层读取值。要阅读开发者指南,请移步 Google 文档 。
要在 GTM 中创建数据层变量,请按照下列步骤操作:
- 找到 Variables ,点击 User-Defined Variables 下的 New 。
- 为变量命名,例如
DLV - Transaction Revenue。这是您标签代码片段中使用的名称,例如{{DLV - Transaction Revenue}}。 - 选择 Data Layer Variable 作为 变量类型 。
- 在 Data Layer Variable Name 字段中,准确输入数据层中使用的键名。例如
transaction_total。 - 将 Data Layer Version 设置为 Version 2 。
- (可选) 如果变量可能不存在,请设置 默认值 。
- 保存 变量。
针对每条动态数据重复上述步骤。完成创建后即可在 Adjust 事件标签中使用。
以下是变量配置示例:
